The biopsy itself is often the shortest part of the process. A doctor removes a small piece of tissue, drops it into a container, and tells you the results will take a few days.
Then comes the waiting.
For most patients, that gap is the hardest part — partly because nobody explains what is actually happening. The sample is not sitting in a queue. It is moving through a carefully controlled sequence of chemical and mechanical steps, each of which takes real time and cannot safely be rushed.
Here is what happens to your tissue between the procedure room and the diagnosis on your report.
Step 1: The Sample Is Preserved Immediately
The moment tissue leaves your body, it begins to break down. Cells release enzymes that digest their own structures, a process called autolysis. Left alone for even a few hours at room temperature, the architecture a pathologist needs to read would be destroyed.
To prevent this, the sample goes straight into a fixative — almost always 10% neutral buffered formalin. Formalin cross-links proteins, effectively freezing the tissue's internal structure in place.
A few details matter more than most patients realise:
Volume ratio. Laboratories aim for roughly ten times more fixative than tissue, so the sample is fully immersed.
Timing. The interval between removal and fixation, known as cold ischemia time, is kept as short as possible. For breast cancer specimens, ASCO and the College of American Pathologists recommend under one hour, because delays can distort hormone receptor and HER2 test results.
Duration. Fixation typically needs 6 to 72 hours depending on specimen size. Too short and the centre of the tissue is unpreserved; too long and some proteins become difficult to detect later.
This single step is one reason a biopsy result cannot come back the same afternoon.
Step 2: Accessioning and Chain of Custody
When the container arrives at the pathology laboratory, it is logged in — a step called accessioning.
The sample receives a unique identifying number that will follow it through every subsequent stage: on the container, on the cassette, on the paraffin block, on each glass slide, and finally on your report.
Staff cross-check the container label against the requisition form, your identifiers, the anatomical site, and the clinical history your doctor provided. Any mismatch stops the process immediately.
It sounds bureaucratic. It is also the single most important safeguard against the one error no laboratory can tolerate: a specimen mix-up.
Step 3: Gross Examination
Next, a pathologist or pathologists' assistant examines the specimen with the naked eye. This is called grossing.
They describe and record what they see — size, colour, texture, any visible abnormality — and photograph it if relevant.
For surgical resections rather than small needle biopsies, this stage also involves inking the margins. Different coloured dyes are painted onto the outer surfaces so that, later under the microscope, the pathologist can tell exactly how close tumour cells came to the edge of what was removed.
The specimen is then cut into thin, representative slices and placed into small perforated tissue embedding cassettes. A tiny core needle biopsy may fill a single cassette; a large resection may generate dozens.
Step 4: Tissue Processing
The cassettes go into an automated tissue processor, usually overnight. This stage takes roughly 8 to 14 hours and has three phases.
Dehydration. Water is removed by passing the tissue through increasing concentrations of alcohol. Water and paraffin wax do not mix, so every trace has to go.
Clearing. The alcohol is replaced by a solvent such as xylene, which is miscible with both alcohol and wax.
Infiltration. The tissue is bathed in molten paraffin wax at around 58–60°C until the wax has penetrated every space previously occupied by water.
By morning, the tissue is wax-infiltrated throughout — soft biological material converted into something that can be cut cleanly and precisely.
Step 5: Embedding
A technician removes each piece of tissue from its cassette and orients it in a small mould filled with molten wax, which is then cooled on a cold plate until solid.
Orientation is a skilled judgement. A skin biopsy has to be positioned on edge so all its layers appear in cross-section. A tubular structure needs to be cut across rather than along. Get it wrong and the pathologist sees the wrong plane of tissue.
The result is a paraffin block — the durable, room-temperature-stable form your tissue will now stay in. Blocks are archived for years, which is why doctors can sometimes order new tests on a biopsy taken long ago.
Step 6: Sectioning on the Microtome
The block is mounted on a microtome, an instrument that shaves off sections typically 3 to 5 micrometres thick. For scale, a human hair is around 70 micrometres across.
Successive sections come off as a connected ribbon, which is floated on a warm water bath at about 40–45°C. The warmth relaxes compression from the blade and smooths out wrinkles.
The section is then lifted from the water onto a glass slide. Ordinary slides work for routine staining, but delicate sections and anything destined for immunohistochemistry are picked up on adhesive-coated microscope slides — silane or positively charged surfaces that grip the tissue electrostatically so it does not detach during the aggressive heating and washing steps that follow.
Slides are dried in an oven to bond the section firmly to the glass.
Step 7: Staining
Unstained tissue under a microscope is nearly transparent and almost featureless. Staining supplies the contrast.
The universal routine stain is haematoxylin and eosin, known everywhere as H&E:
Haematoxylin binds to acidic structures, principally DNA, colouring cell nuclei blue-purple.
Eosin binds to proteins in the cytoplasm and connective tissue, colouring them shades of pink.
That two-colour scheme is enough for a trained eye to assess cell size and shape, nuclear detail, growth pattern, invasion, and tissue architecture.
Finally a thin glass coverslip is mounted over the section with a clear medium, protecting it and improving optical clarity. The slide is now ready — and permanent.
Step 8: Microscopic Examination
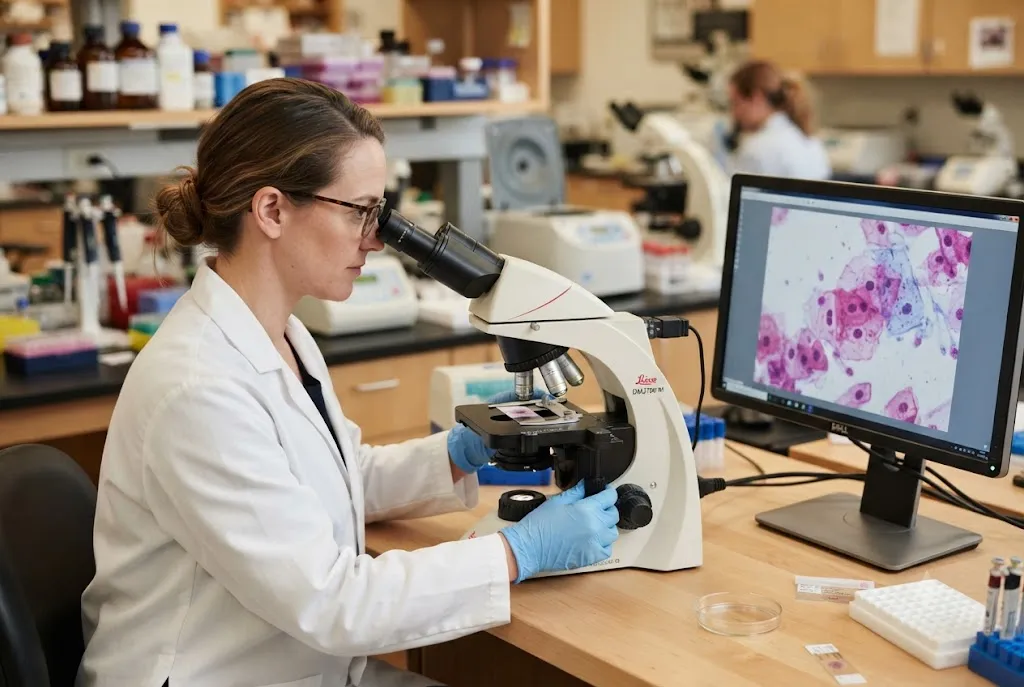
Only now does the pathologist sit down at the microscope.
They work systematically: first at low magnification to assess overall architecture, then at higher power to examine individual cells. They are asking a sequence of questions.
Is the tissue normal, inflamed, infected, benign, or malignant?
If malignant, what type of cell has it arisen from?
How abnormal do the cells look compared with normal tissue — the tumour grade?
Has it invaded surrounding structures, blood vessels, or lymphatics?
Are the surgical margins clear of tumour?
Many cases end here, with a confident diagnosis from H&E alone.
When Extra Tests Are Needed
Sometimes appearance is not enough, and the pathologist orders additional work on the same block. This is the most common reason a report takes longer than expected.
Special stains highlight particular substances — organisms, iron, mucin, connective tissue fibres. Turnaround: usually within a day.
Immunohistochemistry (IHC) uses antibodies tagged with a visible marker to detect specific proteins. It identifies the tissue of origin in an unclear tumour, and measures treatment-relevant markers such as oestrogen receptor, progesterone receptor, HER2 and PD-L1. Typically adds one to two days.
Molecular and genetic testing, including next-generation sequencing, looks for mutations that determine eligibility for targeted therapy. This can add one to three weeks and is often sent to a specialised reference laboratory.
Second opinion review by a subspecialist colleague is standard practice for difficult or unusual cases, and adds time by design rather than by delay.
Bone and calcified specimens need an extra decalcification step before processing, which alone can add several days.
What About Frozen Sections?
If you have heard of results arriving during surgery, that is a frozen section.
Instead of formalin and paraffin, the fresh tissue is snap-frozen, sectioned on a cryostat, rapidly stained and read within roughly 15 to 20 minutes while the patient is still on the table.
It answers urgent questions: is this tissue malignant, is the margin clear, should the surgeon extend the operation?
The trade-off is quality. Ice crystals distort cellular detail, so frozen sections are less reliable than standard processing. They are treated as provisional guidance, and the definitive diagnosis always comes from the paraffin-embedded tissue afterwards. Occasionally the two differ, which is why the final report supersedes anything said in theatre.
Step 9: The Report
The pathologist dictates the findings into a structured report that generally includes:
The clinical information and specimen received
The gross description
The microscopic description
Results of any special stains, IHC, or molecular tests
The final diagnosis, with tumour type, grade, size, margin status and stage where applicable
Reports are usually issued 2 to 10 days after the procedure, depending on complexity, and go to the doctor who ordered the biopsy rather than directly to you.
Pathology reports are written for clinicians, so the language is dense. The National Cancer Institute publishes a plain-language guide that many patients find useful, and you are entitled to request a copy of your own report and ask your doctor to walk you through it.
Why the Wait Is Actually a Good Sign
Reframed honestly, the delay is a sequence of irreducible physical processes:
Fixation needs hours. Processing needs a night. Embedding, sectioning and staining need skilled hands. Additional tests need their own runs. Complex cases need a second pair of eyes.
A laboratory that returned every biopsy in four hours would be cutting one of those steps — and the diagnosis in your report determines whether you have surgery, chemotherapy, radiation, or nothing at all.
Accreditation systems exist precisely to enforce this. Laboratories accredited by bodies such as the College of American Pathologists or under national equivalents are inspected on specimen handling, staining quality, turnaround monitoring and diagnostic concordance.
Questions Worth Asking Your Doctor
When was the sample sent, and when is the report expected?
Are any additional tests being run, and roughly how long will they take?
Will my case be discussed at a multidisciplinary or tumour board meeting?
Can I have a copy of the pathology report?
Is my tissue block retained, in case further testing is needed later?
In Short
Between the procedure room and the diagnosis, a fragment of your tissue is preserved, described, dehydrated, waxed, sliced to a few microns, stained, coverslipped and read by a specialist — often with further antibody or genetic testing layered on top.
It is one of the most standardised workflows in all of medicine, and almost none of it is visible to the patient waiting on the result.
Knowing what is happening does not make the wait shorter. But it does make it easier to understand why the answer, when it arrives, is worth the days it took.
Disclaimer: This article is for general educational purposes and does not constitute medical advice. Discuss your individual results and treatment options with your own doctor.

Reviewed by